
Step 1: Verify Property
Learn how to verify your property before enabling Analytics & Agent Site.
When you first log in to your org, you will be taken to the property overview page. If you don't have any properties configured, you will see this form that you can use to create your property. Create your property by giving it a name and inputting the domain name, i.e. example.com for your property.
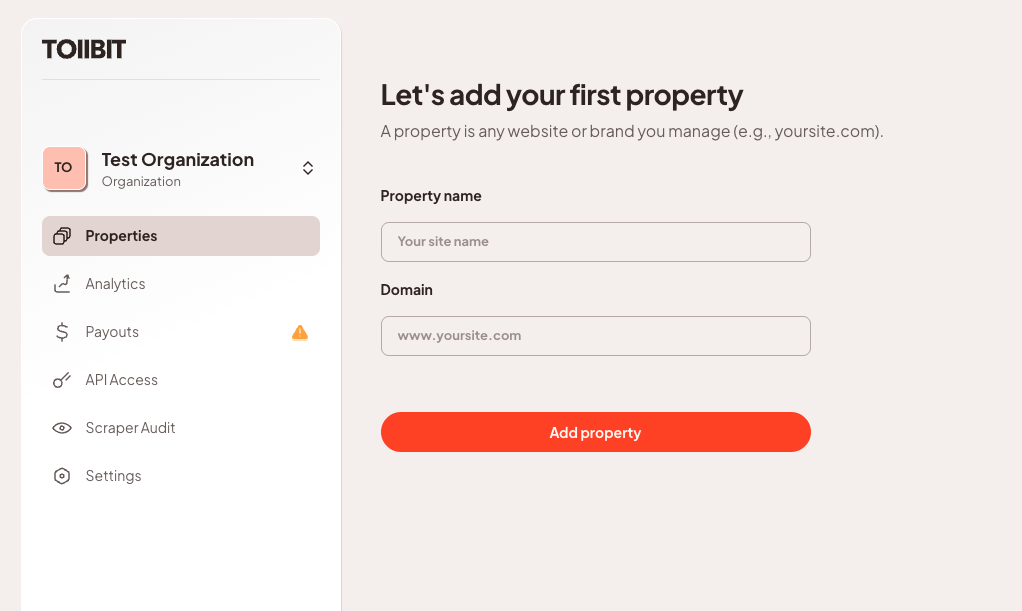
Once you've added your property, we will automatically fetch your sitemap through your robots.txt to determine your site's layout.
Pro TipWe recommend publishers maintain a
robots.txtfile and a sitemap that is kept up to date. However, this is not required to onboard onto TollBit.
Verifying a Property
Once you create a property, TollBit needs to verify your ownership of the domain and spin up your agent site. The records to be placed in your DNS registry will follow right after you have created your property.
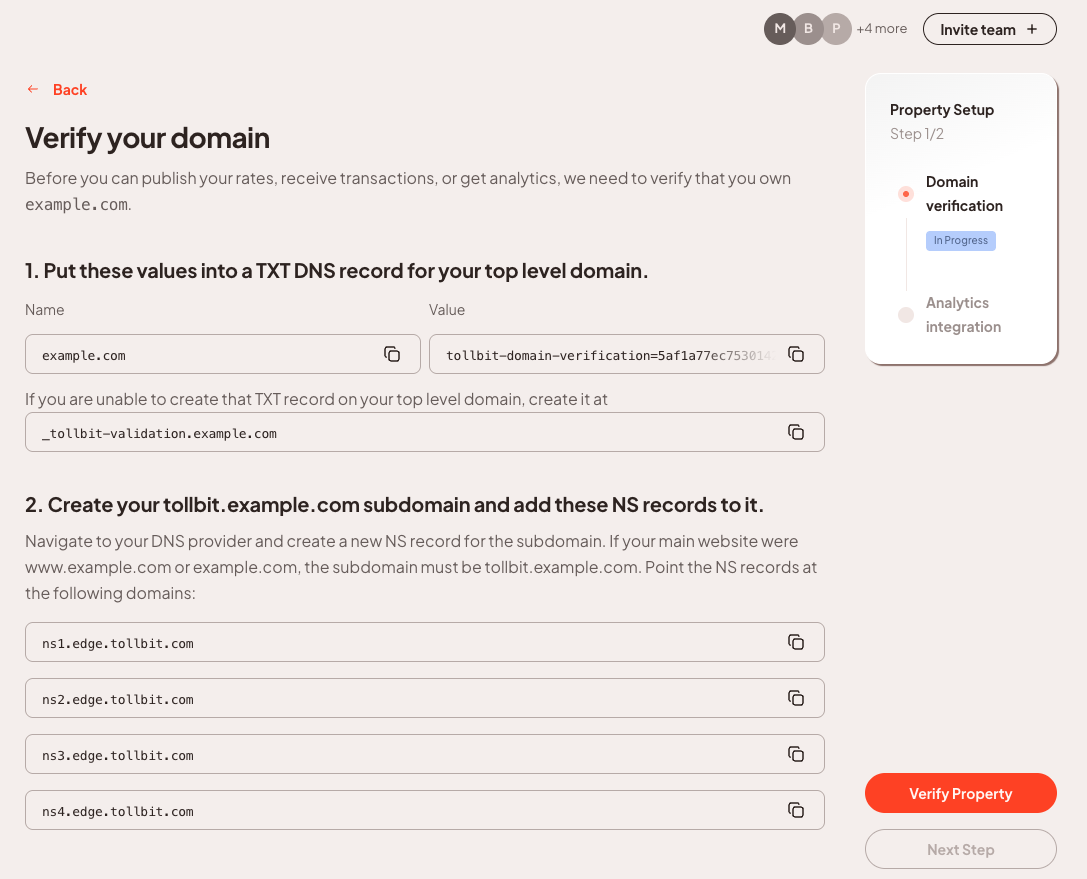
Step 1: Create TXT Record in your DNS registry
In your domain's DNS settings, create a TXT record for your top level domain (example.com, not tollbit.example.com. This might be a field called "name" or "host" when creating this record). Copy the TXT record value from the TollBit dashboard (it will look like tollbit-domain-verification=...) and paste it into the TXT you created. If you are unable to put the TXT record on your top level domain (if you already have a CNAME), you can put the TXT record on the _tollbit-validation subdomain. Looking at the full host, this would be _tollbit-validation.example.com.
Step 2: Set Up Subdomain in your DNS registry
As part of verification, we will also set up the tollbit subdomain in your registrar. This allows users to easily access the content mirrored on your main website. This will not affect your main website's SEO, load times, etc.
Navigate to your DNS provider and create a new NS record for the subdomain. If your main website were www.example.com or example.com, the subdomain must be tollbit.example.com. Point the NS records at the following domains:
ns1.edge.tollbit.comns2.edge.tollbit.comns3.edge.tollbit.comns4.edge.tollbit.com
Pro TipDepending on your DNS provider, there may be a short period between saving your DNS updates and when the changes are visible to TollBit. This is normal and we give you the ability to continue with the onboarding process while you wait for these changes to propagate
Bulk Updating DNS Records
This guide covers how to update TXT and NS records across multiple sites using the DNS management tools your publishers already use. Whether you're rolling out new SPF/DKIM/DMARC records, changing nameservers, or making platform-wide DNS changes, each registry handles bulk operations differently — use the links below to find the right workflow for your provider.
For any bulk update (10+ sites), we recommend using each provider's API or CLI tooling rather than their dashboard, which typically requires editing domains one at a time. Always back up existing records and lower your TTL before making changes.
DNS Provider References
-
GoDaddy — Manage DNS records via the dashboard or REST API;
-
Amazon Route 53 — AWS's DNS service supports bulk changes via JSON change-batches applied through the AWS CLI or SDK.
-
Cloudflare — Offers a REST API, Terraform provider, and the flarectl CLI for scripted bulk DNS record management.
-
Azure DNS — Microsoft's cloud DNS integrates with Azure CLI and PowerShell for scripted bulk record management across zones.
-
Namecheap — API access (with IP whitelisting) supports bulk changes via setHosts, which replaces all records for a domain at once.
-
Google Domains / Squarespace — Domain management moved to Squarespace in 2023; DNS records are managed per-domain through the Squarespace dashboard with no bulk API available.
Whitelist TollBot user agent
Once your property is verified, TollBit recommends whitelisting the TollBot user agent. This allows the platform to run periodic reviews to understand site structure and content changes over time. The fetched site map can then be indexed for analytics and content delivery to LLMs for the fee that you choose.
Our user agent will be called "tollbot", stylized as "tollbot/1.0". Please whitelist this user agent. You can also find our IPs here: https://tollbit.com/static-ips.txt.
Note that the syncs are setup initially once a site is onboarded, and then nightly afterwards to ensure we have an up to date structural understanding of the site. There may also be periodic requests to a small number of main pages or feeds to understand what changed.