
Logging
We provide a way for you to forward logs to our platform so that we can provide analytics on bot traffic and more. This provides a great way to consolidate your logs and gain fast insights about what your bot traffic looks like. It is essential that the logs forwarded to us are server side logs from your CDN/edge, as client side javascript plugins are only triggered if the javascript is run, which most bots do not do. Server side logs will ensure that we have the cleanest view of the traffic hitting your site.
Fastly
Follow these steps to set up an integration into our platform if you use Fastly.
Create a new Logging Configuration
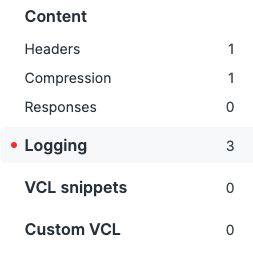
Go to your Fastly Dashboard and pick the correct domain. Click “Edit Configuration”, and clone your current configuration. This saves a new configuration version as a draft, and allows you to rollback if necessary. This should bring you to a new screen. On the sidebar, scroll down until you see Logging and click on that. Then, click “Create Endpoint”.
Configure your logs to be sent to our logging endpoint

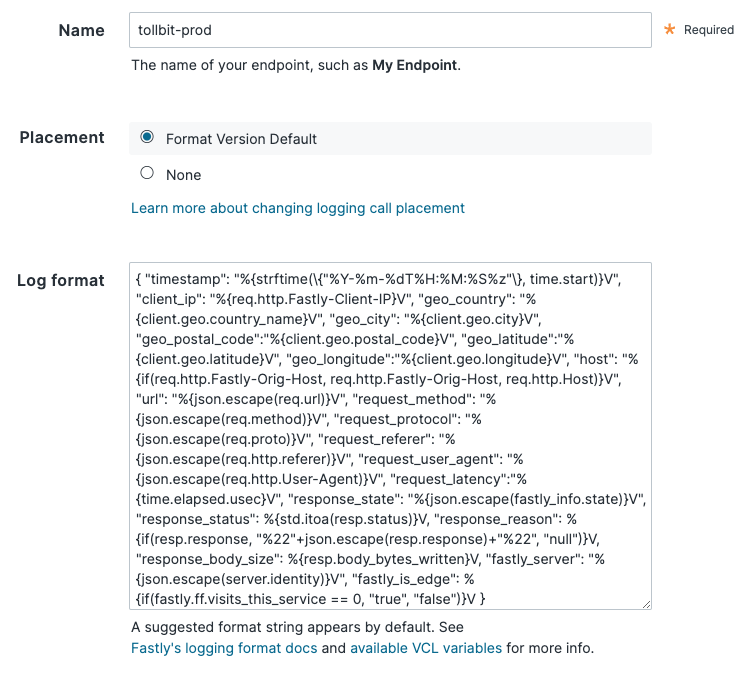
Find the HTTP logging endpoint and click “Create endpoint”. You can set the name to anything descriptive (e.g. tollbit-prod). Keep the placement option as the default selection. Make sure your log format is exactly as follows, without extra trailing spaces or newlines:
{ "timestamp": "%{strftime(\{"%Y-%m-%dT%H:%M:%S%z"\}, time.start)}V", "geo_country": "%{client.geo.country_name}V", "geo_city": "%{client.geo.city}V", "geo_postal_code":"%{client.geo.postal_code}V", "geo_latitude":"%{client.geo.latitude}V", "geo_longitude":"%{client.geo.longitude}V", "host": "%{if(req.http.Fastly-Orig-Host, req.http.Fastly-Orig-Host, req.http.Host)}V", "url": "%{json.escape(req.url)}V", "request_method": "%{json.escape(req.method)}V", "request_protocol": "%{json.escape(req.proto)}V", "request_referer": "%{json.escape(req.http.referer)}V", "request_user_agent": "%{json.escape(req.http.User-Agent)}V", "request_latency":"%{time.elapsed.usec}V", "response_state": "%{json.escape(fastly_info.state)}V", "response_status": %{std.itoa(resp.status)}V, "response_reason": %{if(resp.response, "%22"+json.escape(resp.response)+"%22", "null")}V, "response_body_size": %{resp.body_bytes_written}V, "fastly_server": "%{json.escape(server.identity)}V", "fastly_is_edge": %{if(fastly.ff.visits_this_service == 0, "true", "false")}V, "signature": "%{json.escape(req.http.signature)}V", "signature_agent": "%{json.escape(req.http.signature-agent)}V", "signature_input": "%{json.escape(req.http.signature-input)}V" }
Finally, set the URL to https://log.tollbit.com/log.
Ensure that your Requests are Authenticated
Go into Advanced Options and set the “Custom header name” field to “TollbitKey”. You must set the customer header value to your secret key. Log into your TollBit portal and go into the API key tab and copy your secret key. Paste it into the “Custom header value” field with no trailing spaces. Keep all the other settings as default, scroll to the bottom, and save.
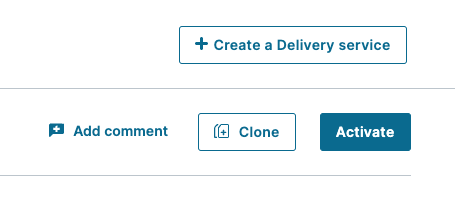
Once you are ready to publish these changes, click the “Activate” button. Keep in mind that if you have other unpublished changes in Fastly, this may also publish those as well.
CloudFlare
We provide a way for all CloudFlare customers, regardless of plan, to forward HTTP logs to our platform for analytics. We recommend this method over others like LogPush as CloudFlare Enterprise is not required to create workers, and you have much more control over how logs are sent.
CloudFlare Enterprise
If you are on the Enterprise plan, you should have access to CloudFlare's Logpush feature. You may already be pushing logs to an S3, R2 or GCP bucket. If this is the case, we are able to ingest your logs from where they are already being stored.
One small update you may need to make is adding the location response header and the signature-agent, signature-input
and signature request headers to the logs. Follow
these steps
in Cloudflare's documentation to add this header. You will want to select
"Response Header" as the field type and type in location, and select "Request Header" and type in
signature-agent, signature-input and signature.
If your logs are already being sent to an S3 bucket, add the following IAM policy to your bucket to enable TollBit to process your logs:
{
  "Version": "2025-05-07",
  "Statement": [
    {
      "Sid": "AllowTollbitAccountsAccess",
      "Effect": "Allow",
      "Principal": {
        "AWS": [
          "arn:aws:iam::339712821696:root",
          "arn:aws:iam::654654318267:root"
        ]
      },
      "Action": ["s3:GetObject*", "s3:ListBucket*"],
      "Resource": [
        "arn:aws:s3:::YOUR-BUCKET-NAME",
        "arn:aws:s3:::YOUR-BUCKET-NAME/*"
      ]
    }
  ]
}
Once you have done that, reach out to team@tollbit.com and provide the path to your logs in your bucket and we will be able to quickly enable TollBit analytics for your site.
If you are not on Enterprise, read on to set up a worker to forward logs.
Create new Worker
You must be proxying traffic through CloudFlare in order have the worker
seconds your logs over to us. Most websites are already doing this, but if you
are not certain, you can check by going into your site's DNS page and ensuring
that your main site's DNS settings have proxy status as Proxied.

If you already have an existing worker that is intercepting requests for your site, or you already set up a worker in the Bot Paywall section, you will need to integrate this logging code with that worker. If you just have a bot deterrence worker set up, see that section to get a code snippet that also pushes logs.
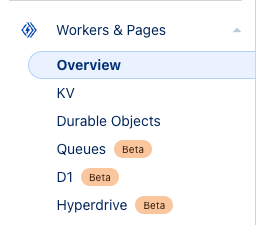
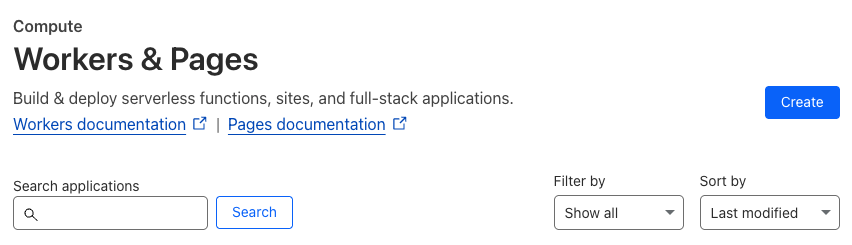
Log into your CloudFlare Dashboard and click on the "Compute (Workers)" tab to have it open as a dropdown, and click on "Workers & Pages".
Click on the blue "Create" button near the top.
This will take you to a get started screen. Choose the option to create a hello world worker, as we were be overwriting all the worker code in the next few steps anyways.

Next will be a screen where you can name your worker and see the initial code
that it will be running. Set the name to something TollBit related such as
tollbit-worker, and click deploy. We will be modifying the worker code
shortly.

Updating the Worker Code
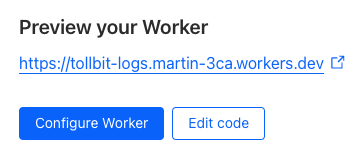
Once your worker has finished deploying, click "Edit code".
In the worker.js file, delete everything and copy the following code over
exactly, making sure to replace YOUR_SECRET_KEY_HERE with the secret key you
can find in your portal.
const CF_APP_VERSION = '1.0.0'

const tollbitLogEndpoint = 'https://log.tollbit.com/log'
const tollbitToken = 'YOUR_SECRET_KEY_HERE'

const sleep = (ms) => {
  return new Promise((resolve) => {
    setTimeout(resolve, ms)
  })
}

const makeid = (length) => {
  let text = ''
  const possible = 'ABCDEFGHIJKLMNPQRSTUVWXYZ0123456789'
  for (let i = 0; i < length; i += 1) {
    text += possible.charAt(Math.floor(Math.random() * possible.length))
  }
  return text
}

const buildLogMessage = (request, response) => {
  const logObject = {
    timestamp: new Date().toISOString(),
    client_ip: '', // worker only is able to get cloudflare edge IP, leaving blank
    geo_country: request.cf['country'],
    geo_city: request.cf['city'],
    geo_postal_code: request.cf['postalCode'],
    geo_latitude: request.cf['latitude'],
    geo_longitude: request.cf['longitude'],
    host: request.headers.get('host'),
    url: request.url.replace('https://' + request.headers.get('host'), ''),
    request_method: request.method,
    request_protocol: request.cf['httpProtocol'],
    request_user_agent: request.headers.get('user-agent'),
    request_latency: null, // cloudflare does not have latency information
    request_referer: request.headers.get('referer'),
    response_state: null,
    response_status: response.status,
    response_reason: response.statusText,
    response_body_size: response.contentLength,
    signature: request.headers.get('signature'),
    signature_agent: request.headers.get('signature-agent'),
    signature_input: request.headers.get('signature-input'),
  }
  return logObject
}

// Batching
const BATCH_INTERVAL_MS = 20000 // 20 seconds
const MAX_REQUESTS_PER_BATCH = 500 // 500 logs
const WORKER_ID = makeid(6)

let workerTimestamp

let batchTimeoutReached = true
let logEventsBatch = []

// Backoff
const BACKOFF_INTERVAL = 10000
let backoff = 0

async function addToBatch(body, event) {
  logEventsBatch.push(body)

  if (logEventsBatch.length >= MAX_REQUESTS_PER_BATCH) {
    event.waitUntil(postBatch(event))
  }

  return true
}

async function handleRequest(event) {
  const { request } = event

  const response = await fetch(request)
  const rCf = request.cf
  delete rCf.tlsClientAuth
  delete rCf.tlsExportedAuthenticator

  const eventBody = buildLogMessage(request, response)
  event.waitUntil(addToBatch(eventBody, event))

  return response
}

const fetchAndSetBackOff = async (lfRequest, event) => {
  if (backoff <= Date.now()) {
    const resp = await fetch(tollbitLogEndpoint, lfRequest)
    if (resp.status === 403 || resp.status === 429) {
      backoff = Date.now() + BACKOFF_INTERVAL
    }
  }

  event.waitUntil(scheduleBatch(event))

  return true
}

const postBatch = async (event) => {
  const batchInFlight = [...logEventsBatch.map((e) => JSON.stringify(e))]
  logEventsBatch = []
  const body = batchInFlight.join('\n')
  const request = {
    method: 'POST',
    headers: {
      TollbitKey: `${tollbitToken}`,
      'Content-Type': 'application/json',
    },
    body,
  }
  event.waitUntil(fetchAndSetBackOff(request, event))
}

const scheduleBatch = async (event) => {
  if (batchTimeoutReached) {
    batchTimeoutReached = false
    await sleep(BATCH_INTERVAL_MS)
    if (logEventsBatch.length > 0) {
      event.waitUntil(postBatch(event))
    }
    batchTimeoutReached = true
  }
  return true
}

addEventListener('fetch', (event) => {
  event.passThroughOnException()

  if (!workerTimestamp) {
    workerTimestamp = new Date().toISOString()
  }

  event.waitUntil(scheduleBatch(event))
  event.respondWith(handleRequest(event))
})
Hit "Deploy" on the upper righthand corner once you are finished, and then navigate out of the editor with the little back arrow on the upper left side of the page, next to the name of the worker.
Link worker to CloudFlare HTTP Logs
Click on "Account Home" on the left pane and select the website that you would
like to forward logs for, and click into it. On the left panel, click into
"Worker Routes", and then click "Add route". Set the route to
*.<your_site.com>/*, or a custom path if you only want to forward logs for
certain URL patterns. Under workers, choose the worker that you just created.
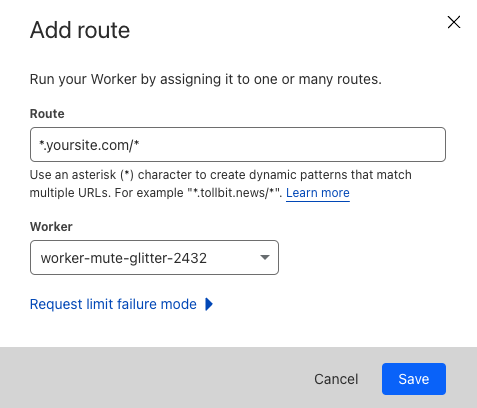
Once you are ready, click "Save", and you are all set!
If your main site does not use the www subdomain and all traffic to www gets
redirected to your main site (www.example.com gets redirected to example.com),
you will need to set your worker route to just <your_site.com>/*.
Minimizing Worker Usage
By default, the above configuration will have every request to your site run through your worker. To reduce the number of requests for workers, we must keep in mind that our analytics platform works best if we try to send logs that correspond to page views, and avoid sending logs that are for requests for static assets or javascript files.
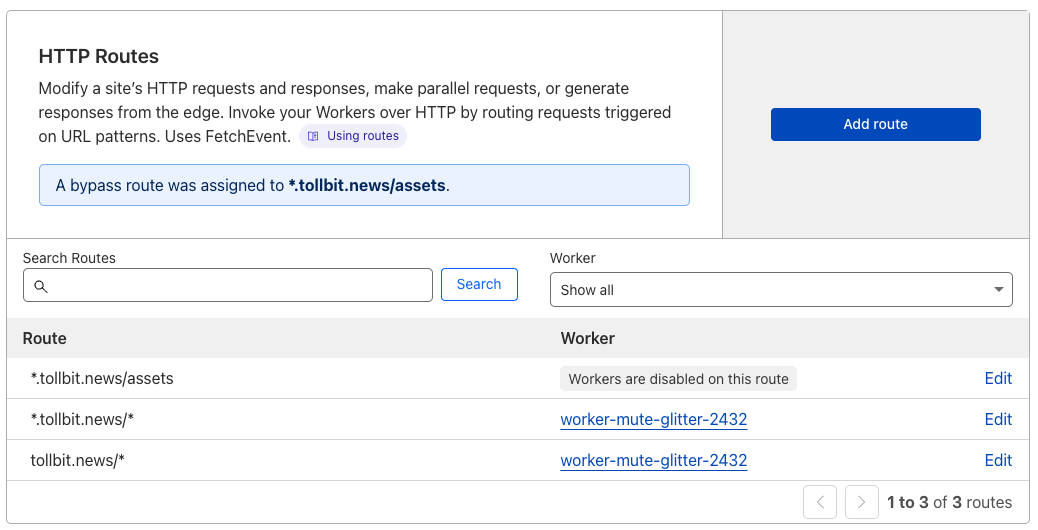
To successfully minimize worker usage, investigate your directory structure and see if you
have a common paths for static assets. For example, some CMS frameworks will have
a directory similar to example.com/assets for assets. To avoid running the worker on
these request paths, create a new route for your worker for that path, in this example
*.example.com/assets* and example.com/assets*, and set the worker for that route to
be "Empty".
Your route page will then look something like the following.
If you aren't sure which route to disable, consider running the worker on your full site and then using the top pages chart in our analytics platform to understand any routes you wish to filter out.
Akamai
We provide a way for all Akamai customers to stream logs to our platform.
Create a Stream with DataStream 2
You will need to first create a stream by going to your Akamai Control Center. Follow these instructions on how to create your stream.
Choose Data Parameters
When choosing data parameters, make sure to parameters that cover at least everything in following sample log JSON. Also, please ensure that your log format is JSON.
{
  "version": 1,
  "streamId": "12345",
  "cp": "123456",
  "reqId": "1239f220",
  "reqTimeSec": "1573840000",
  "bytes": "4995",
  "cliIP": "128.147.28.68",
  "statusCode": "206",
  "proto": "HTTPS",
  "reqHost": "test.hostname.net",
  "reqMethod": "GET",
  "reqPath": "/path1/path2/file.ext",
  "reqPort": "443",
  "rspContentLen": "5000",
  "rspContentType": "text/html",
  "UA": "Mozilla%2F5.0+%28Macintosh%3B+Intel+Mac+OS+X+10_14_3%29",
  "tlsOverheadTimeMSec": "0",
  "tlsVersion": "TLSv1",
  "objSize": "484",
  "uncompressedSize": "484",
  "overheadBytes": "232",
  "totalBytes": "0",
  "queryStr": "param=value",
  "breadcrumbs": "//BC/%5Ba=23.33.41.20,c=g,k=0,l=1%5D",
  "accLang": "en-US",
  "cookie": "cookie-content",
  "range": "37334-42356",
  "referer": "https%3A%2F%2Ftest.referrer.net%2Fen-US%2Fdocs%2FWeb%2Ftest",
  "xForwardedFor": "8.47.28.38",
  "maxAgeSec": "3600",
  "reqEndTimeMSec": "3",
  "errorCode": "ERR_ACCESS_DENIED|fwd_acl",
  "turnAroundTimeMSec": "11",
  "transferTimeMSec": "125",
  "dnsLookupTimeMSec": "50",
  "lastByte": "1",
  "country": "IN",
  "state": "Virginia",
  "city": "HERNDON"
}
Stream to Endpoint
To forward your logs to us, follow the steps outlined
here. The
endpoint url that you should be streaming to is
https://log.tollbit.com/log/akamai.
Select none for authentication for now, as we will be setting up custom
authentication. To do so, go to "Custom header". For the content type, you can
select application/json. Add a new header value with the key TollbitKey and
the value as your secret key from your dashboard.
Finally, you can review and activate your stream!
Vercel
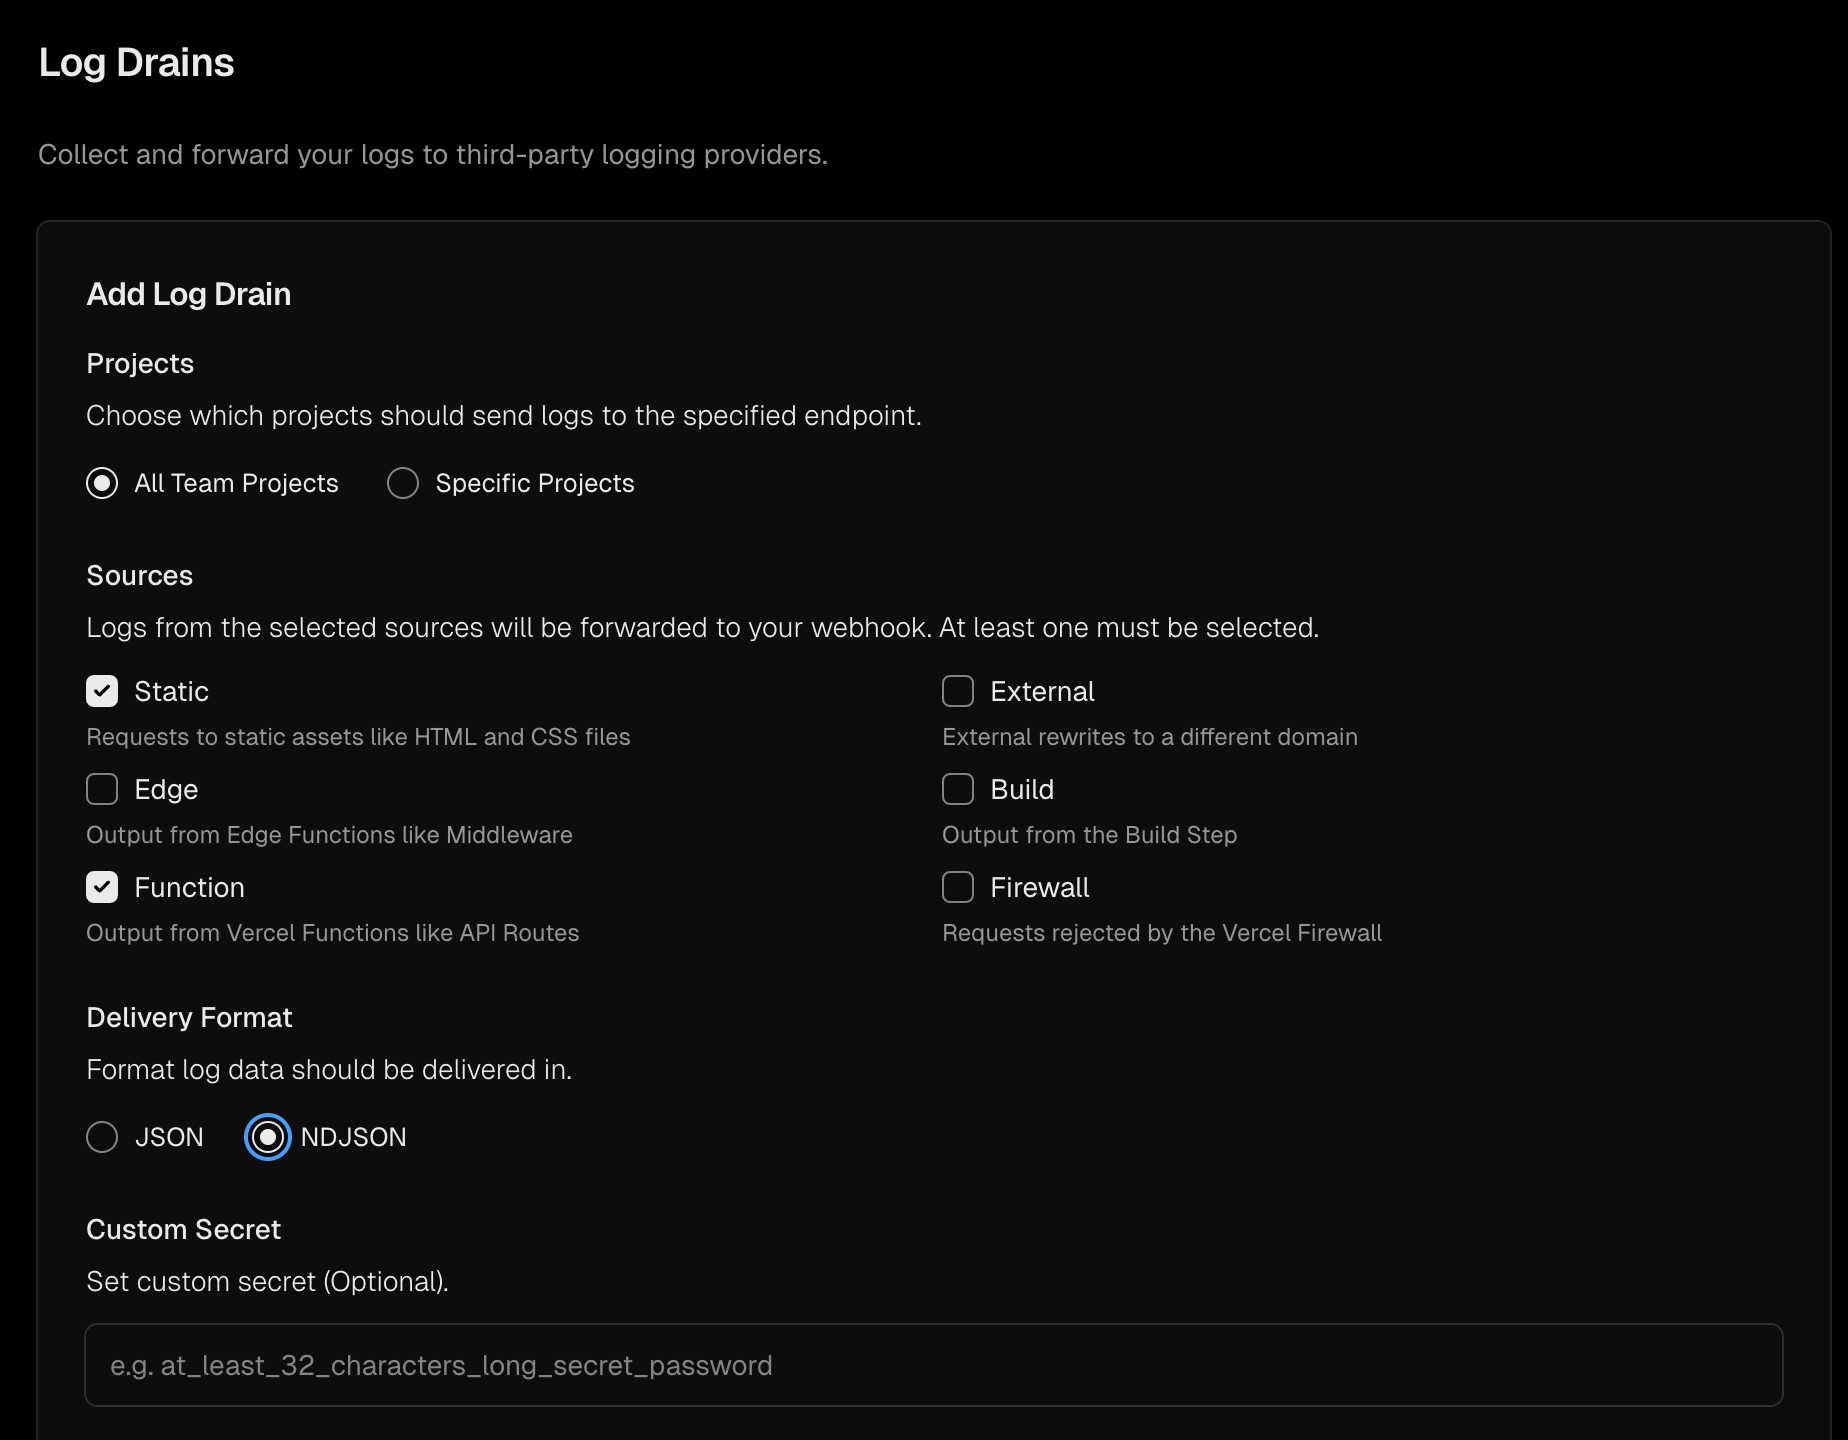
To forward logs from Vercel, follow the instructions for Log Drains here.
To properly authenticate and verify your logs, you should use the endpoint
https://log.tollbit.com/log/vercel.
In order to verify the endpoint through Vercel, pass the header
x-vercel-tollbit-verify as a custom header, along with your organization's
secret key as the custom header TollbitKey. See the following screenshots for
an example of the configuration. Once you have added these headers, you should
be able to click the Verify button and add your log drain.

Amazon ALB
To forward logs from an ALB, follow these steps outlined in the AWS docs here.
Once you have started forwarding your logs to an S3 bucket, create an IAM policy to allow TollBit to access your logs: If your logs are already being sent to an S3 bucket, add the following IAM policy to your bucket to enable TollBit to process your logs:
{
  "Version": "2025-05-07",
  "Statement": [
    {
      "Sid": "AllowTollbitAccountsAccess",
      "Effect": "Allow",
      "Principal": {
        "AWS": [
          "arn:aws:iam::339712821696:root",
          "arn:aws:iam::654654318267:root"
        ]
      },
      "Action": ["s3:GetObject*", "s3:ListBucket*"],
      "Resource": [
        "arn:aws:s3:::YOUR-BUCKET-NAME",
        "arn:aws:s3:::YOUR-BUCKET-NAME/*"
      ]
    }
  ]
}
Once you have created the policy, reach out to team@tollbit.com to coordinate with our engineering team on the rest of the TollBit Analytics setup.
To finalize your setup, we will need access to the directory in your S3 bucket
where your logs are stored, along with the pattern for how the logs are stored
for instance /service/logs/2024/12/04/log-file
Cloudfront
To forward logs from Cloudfront follow these steps:
Enable standard logging for your Cloudfront distribution following the AWS docs here
Point your logs at an S3 Bucket. Note, we only currently support the default w3c, tab delimited format with the default 33 fields that are included in the logs. If you wish to use JSON and/or modify the fields that Cloudfront logs, please reach out to team@tollbit.com and we can get that set up for you.
Create the following IAM policy for your bucket to allow TollBit to process your logs: If your logs are already being sent to an S3 bucket, add the following IAM policy to your bucket to enable TollBit to process your logs:
{
  "Version": "2025-05-07",
  "Statement": [
    {
      "Sid": "AllowTollbitAccountsAccess",
      "Effect": "Allow",
      "Principal": {
        "AWS": [
          "arn:aws:iam::339712821696:root",
          "arn:aws:iam::654654318267:root"
        ]
      },
      "Action": ["s3:GetObject*", "s3:ListBucket*"],
      "Resource": [
        "arn:aws:s3:::YOUR-BUCKET-NAME",
        "arn:aws:s3:::YOUR-BUCKET-NAME/*"
      ]
    }
  ]
}
Once you have started forwarding your logs to an S3 bucket, and granted TollBit
access, reach out to team@tollbit.com to coordinate with our engineering team on
the rest of the TollBit Analytics setup. To finalize your setup, we will need
access to the directory in your S3 bucket where your logs are stored, along with
the pattern for how the logs are stored for instance
/service/logs/2024/12/04/log-file
Google CDN/Cloud Load Balancer
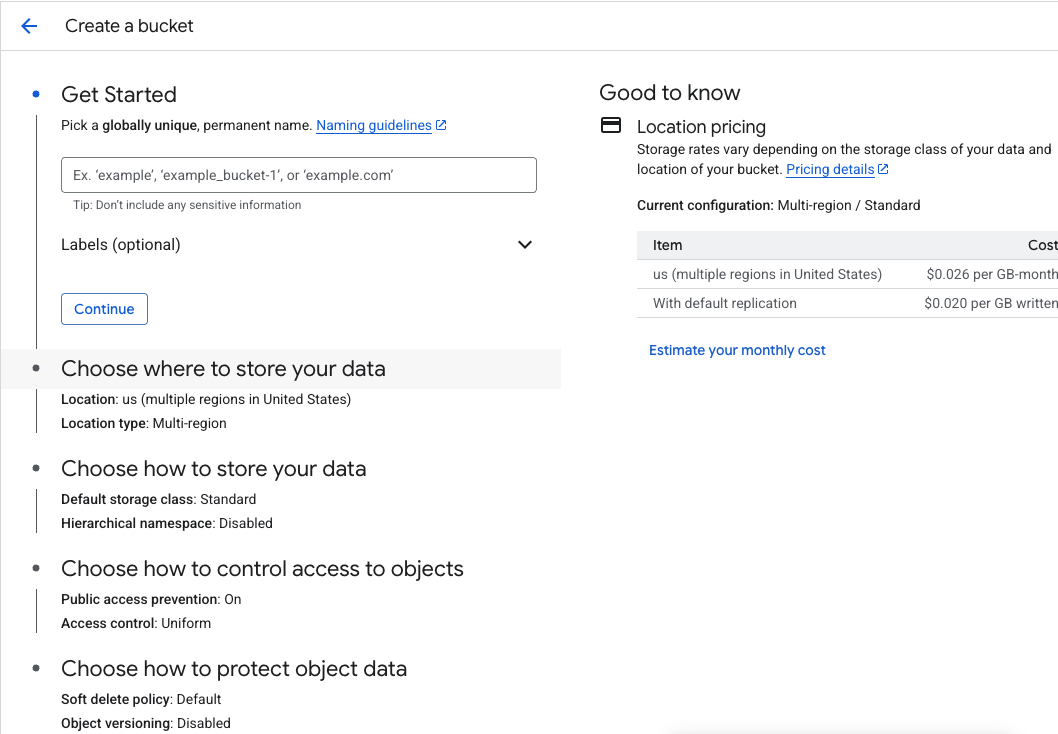
To set up logging for your Google Cloud Load Balancer instance (if you are using Google CDN, it should be backed by a Cloud Load Balancer), you can forward logs to a GCP Storage Bucket.
First, create a bucket you would like to use to hold the logs.
If your load balancer is backed by a non-static backend (you are using another domain or IP address as an orgin, and not a Storage Bucket), you may need to edit your load balancer's configs and enable a 100% sampling rate for backend logging.
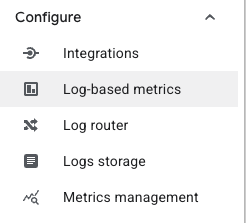
Next, go to the Log Explorer page and on the left hand nav bar, click into "Log router".
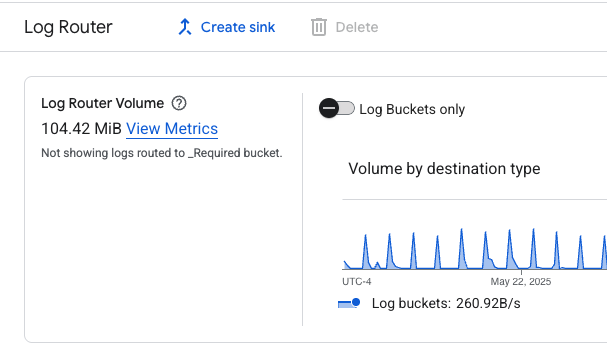
On the top bar, click "Create sink".
Go through the sink creation flow, making sure to set the Storage Bucket you created earlier as the destination. You should set an inclusion filter to ensure that only traffic logs for your load balancer gets stored. Some fields to use for the inclusion filter could be the ID of the load balancer, the underlying domain or IP address, the URL that routes to the load balancer, etc.
Once this sink is created, you may need to wait up to an hour for logs to start appearing in your bucket. Once you've verified that this is set up correctly, please contact us at team@tollbit.com to share your bucket with us.
Azure Front Door
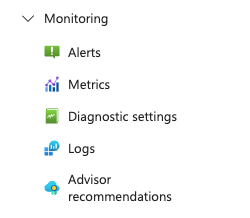
To set up logging for your Azure front door, first navigate to your specific Front Door instance. On the left sidebar, open the dropdown for "Monitoring" and select the "Diagnostics settings" tab.
This will take you to a screen where you can create a new Diagnostics Setting.
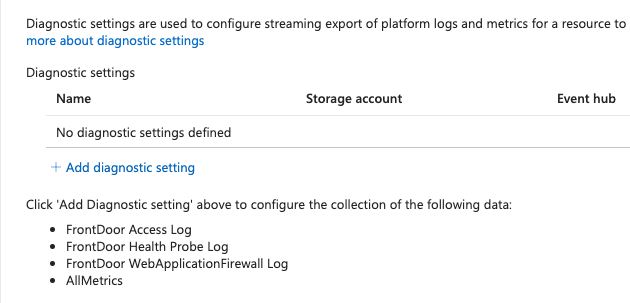
Go ahead and create a new setting. Within, the settings page, selectthe options that will send all access logs to a Storage account. If you don't already have a storage bucket in place for these logs, please create one.

Once you've confirmed that logs are setting stored in your chosen bucket, please reach out to
team@tollbit.com to coordinate with our engineering team on the rest of the TollBit
Analytics setup. To finalize your setup, we will need
access to the directory in your Storage bucket where your logs are stored, along with
the pattern for how the logs are stored for instance
/service/logs/2024/12/04/log-file.
Other Logging Methods
We support other methods of log ingestion besides the integrations that we listed above.
Log Sink Forwarding
You can forward your logs to our log sink endpoint at
https://log.tollbit.com/log as long as you include the header TollbitKey and
set the value to your secret key in your dashboard. The logs must conform to the
following JSON format. Not all fields are required, but we need at least the
timestamp, host, url, request_user_agent, response_status, request_referer and request_method.
{
  timestamp: string, // can be ISO 8601 format or unix timestamp
  geo_country: string,
  geo_city: string,
  geo_postal_code: string,
  geo_latitude: float,
  geo_longitude: float,
  host: string,
  url: string,
  request_method: string,
  request_protocol: string,
  request_user_agent: string,
  request_latency: int/string,
  request_referer: string,
  response_state: string,
  response_status: int/string,
  response_reason: string,
  response_body_size: int/string,
  signature: string,
  signature_agent: string,
  signature_input: string
}
When streaming the logs to the endpoint, please ensure that you are batching logs as much as possible. Each log be a single line, and should be newline separated from the other logs.
Ingesting from file storage
We are currently able to support log ingestion from S3, R2 and GCS. Please ensure that your log files are prefixed by date and time, and that the logs within the files are in JSON format (ideally as similar to the above as possible), and each log is a single line and all logs are newline separated.
If you are already forwarding logs to an S3 bucket, you can get a headstart on the setup by creating the following IAM policy for your bucket: If your logs are already being sent to an S3 bucket, add the following IAM policy to your bucket to enable TollBit to process your logs:
{
  "Version": "2025-05-07",
  "Statement": [
    {
      "Sid": "AllowTollbitAccountsAccess",
      "Effect": "Allow",
      "Principal": {
        "AWS": [
          "arn:aws:iam::339712821696:root",
          "arn:aws:iam::654654318267:root"
        ]
      },
      "Action": ["s3:GetObject*", "s3:ListBucket*"],
      "Resource": [
        "arn:aws:s3:::YOUR-BUCKET-NAME",
        "arn:aws:s3:::YOUR-BUCKET-NAME/*"
      ]
    }
  ]
}
Please contact us at team@tollbit.com to complete the set up for you so you can get access to TollBit Analytics