Bot Paywall
Once you have TollBit set up for your website, you are now able to set up bot deterrence settings on your existing
cloud cybersecurity platform to forward known bot traffic to your new tollbit subdomain.
At a high level, you are simply modifying your existing bot blocking solution to, instead of returning an error response if
it detects a bad bot, to instead forward that traffic over to us through your tollbit subdomain.
The example solutions we provide here assume that you currently do not have bot detection and blocking in place.
It should be straightforward to use these examples to understand how you can update your current blocking solutions
to instead forward detected bots to your tollbit subdomain. Forwarded bots will see a message like the following:
{
  "message": "You are not authorized to access this content without a valid TollBit Token. Please follow this URL to find out more.",
  "url": "https://tollbit.com"
}
AWS WAF + CloudFront
You can use a combination of AWS Web ACLs and CloudFront to detect and redirect bots. This example will use a Web ACL with a WAF rule to detect bots, and then have CloudFront redirect bot traffic.
First, go to the WAF & Shield and create a new Web ACL. Ensure that the ACL being created is for CloudFront distributions. Add your existing CloudFront distribution to this ACL under the "Associated AWS resources" section of the page.
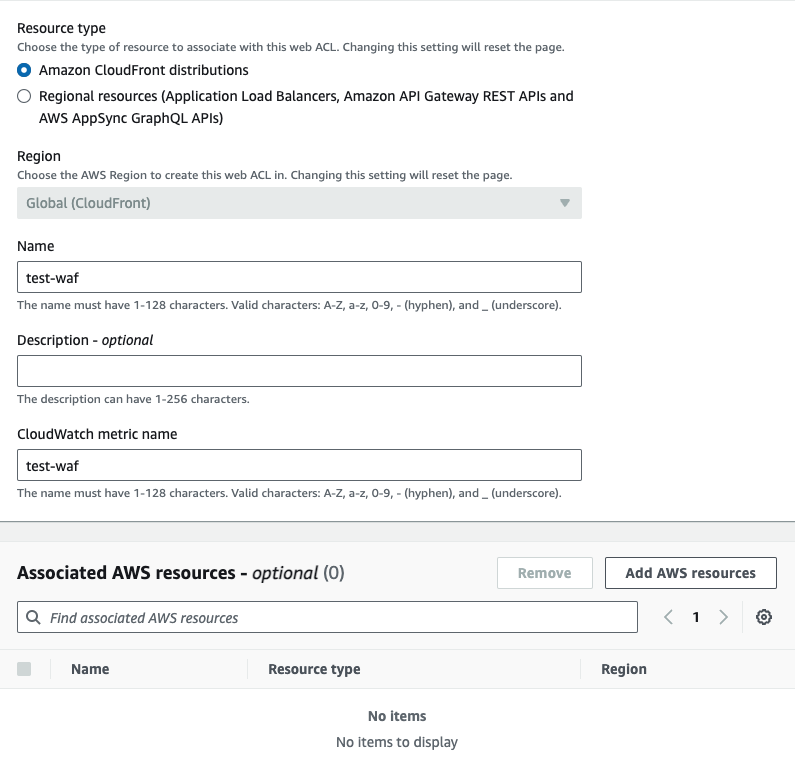
Once you've created the ACL, you can choose any rules you'd like to enable bot detection. AWS Marketplace has managed bot detection rules that you can add to your ACL. We will provide our own WAF rule as well. To use our WAF rule, select the option for using your own rules and rule groups, and use the JSON editor. Copy and paste the following rule:
{
  "Name": "cloudfront-agent-rule",
  "Priority": 0,
  "Statement": {
    "OrStatement": {
      "Statements": [
        {
          "ByteMatchStatement": {
            "SearchString": "chatgpt-user",
            "FieldToMatch": {
              "SingleHeader": {
                "Name": "user-agent"
              }
            },
            "TextTransformations": [
              {
                "Priority": 0,
                "Type": "LOWERCASE"
              }
            ],
            "PositionalConstraint": "CONTAINS"
          }
        },
        {
          "ByteMatchStatement": {
            "SearchString": "perplexitybot",
            "FieldToMatch": {
              "SingleHeader": {
                "Name": "user-agent"
              }
            },
            "TextTransformations": [
              {
                "Priority": 0,
                "Type": "NONE"
              }
            ],
            "PositionalConstraint": "CONTAINS"
          }
        },
        {
          "ByteMatchStatement": {
            "SearchString": "gptbot",
            "FieldToMatch": {
              "SingleHeader": {
                "Name": "user-agent"
              }
            },
            "TextTransformations": [
              {
                "Priority": 0,
                "Type": "LOWERCASE"
              }
            ],
            "PositionalConstraint": "CONTAINS"
          }
        },
        {
          "ByteMatchStatement": {
            "SearchString": "anthropic-ai",
            "FieldToMatch": {
              "SingleHeader": {
                "Name": "user-agent"
              }
            },
            "TextTransformations": [
              {
                "Priority": 0,
                "Type": "LOWERCASE"
              }
            ],
            "PositionalConstraint": "CONTAINS"
          }
        },
        {
          "ByteMatchStatement": {
            "SearchString": "ccbot",
            "FieldToMatch": {
              "SingleHeader": {
                "Name": "user-agent"
              }
            },
            "TextTransformations": [
              {
                "Priority": 0,
                "Type": "LOWERCASE"
              }
            ],
            "PositionalConstraint": "CONTAINS"
          }
        },
        {
          "ByteMatchStatement": {
            "SearchString": "amazonbot",
            "FieldToMatch": {
              "SingleHeader": {
                "Name": "user-agent"
              }
            },
            "TextTransformations": [
              {
                "Priority": 0,
                "Type": "LOWERCASE"
              }
            ],
            "PositionalConstraint": "CONTAINS"
          }
        },
        {
          "ByteMatchStatement": {
            "SearchString": "claude-web",
            "FieldToMatch": {
              "SingleHeader": {
                "Name": "user-agent"
              }
            },
            "TextTransformations": [
              {
                "Priority": 0,
                "Type": "LOWERCASE"
              }
            ],
            "PositionalConstraint": "CONTAINS"
          }
        },
        {
          "ByteMatchStatement": {
            "SearchString": "cohere-ai",
            "FieldToMatch": {
              "SingleHeader": {
                "Name": "user-agent"
              }
            },
            "TextTransformations": [
              {
                "Priority": 0,
                "Type": "LOWERCASE"
              }
            ],
            "PositionalConstraint": "CONTAINS"
          }
        },
        {
          "ByteMatchStatement": {
            "SearchString": "omgilibot",
            "FieldToMatch": {
              "SingleHeader": {
                "Name": "user-agent"
              }
            },
            "TextTransformations": [
              {
                "Priority": 0,
                "Type": "LOWERCASE"
              }
            ],
            "PositionalConstraint": "CONTAINS"
          }
        },
        {
          "ByteMatchStatement": {
            "SearchString": "omgili",
            "FieldToMatch": {
              "SingleHeader": {
                "Name": "user-agent"
              }
            },
            "TextTransformations": [
              {
                "Priority": 0,
                "Type": "LOWERCASE"
              }
            ],
            "PositionalConstraint": "CONTAINS"
          }
        },
        {
          "ByteMatchStatement": {
            "SearchString": "youbot",
            "FieldToMatch": {
              "SingleHeader": {
                "Name": "user-agent"
              }
            },
            "TextTransformations": [
              {
                "Priority": 0,
                "Type": "LOWERCASE"
              }
            ],
            "PositionalConstraint": "CONTAINS"
          }
        },
        {
          "ByteMatchStatement": {
            "SearchString": "bytespider",
            "FieldToMatch": {
              "SingleHeader": {
                "Name": "user-agent"
              }
            },
            "TextTransformations": [
              {
                "Priority": 0,
                "Type": "LOWERCASE"
              }
            ],
            "PositionalConstraint": "CONTAINS"
          }
        },
        {
          "ByteMatchStatement": {
            "SearchString": "diffbot",
            "FieldToMatch": {
              "SingleHeader": {
                "Name": "user-agent"
              }
            },
            "TextTransformations": [
              {
                "Priority": 0,
                "Type": "LOWERCASE"
              }
            ],
            "PositionalConstraint": "CONTAINS"
          }
        },
        {
          "ByteMatchStatement": {
            "SearchString": "oai-searchbot",
            "FieldToMatch": {
              "SingleHeader": {
                "Name": "user-agent"
              }
            },
            "TextTransformations": [
              {
                "Priority": 0,
                "Type": "LOWERCASE"
              }
            ],
            "PositionalConstraint": "CONTAINS"
          }
        },
        {
          "ByteMatchStatement": {
            "SearchString": "meta-externalagent",
            "FieldToMatch": {
              "SingleHeader": {
                "Name": "user-agent"
              }
            },
            "TextTransformations": [
              {
                "Priority": 0,
                "Type": "LOWERCASE"
              }
            ],
            "PositionalConstraint": "CONTAINS"
          }
        },
        {
          "ByteMatchStatement": {
            "SearchString": "timpibot",
            "FieldToMatch": {
              "SingleHeader": {
                "Name": "user-agent"
              }
            },
            "TextTransformations": [
              {
                "Priority": 0,
                "Type": "LOWERCASE"
              }
            ],
            "PositionalConstraint": "CONTAINS"
          }
        },
        {
          "ByteMatchStatement": {
            "SearchString": "perplexity-user",
            "FieldToMatch": {
              "SingleHeader": {
                "Name": "user-agent"
              }
            },
            "TextTransformations": [
              {
                "Priority": 0,
                "Type": "LOWERCASE"
              }
            ],
            "PositionalConstraint": "CONTAINS"
          }
        }
      ]
    }
  },
  "Action": {
    "Allow": {
      "CustomRequestHandling": {
        "InsertHeaders": [
          {
            "Name": "Bot",
            "Value": "true"
          }
        ]
      }
    }
  },
  "VisibilityConfig": {
    "SampledRequestsEnabled": true,
    "CloudWatchMetricsEnabled": true,
    "MetricName": "cloudfront-agent-rule"
  }
}
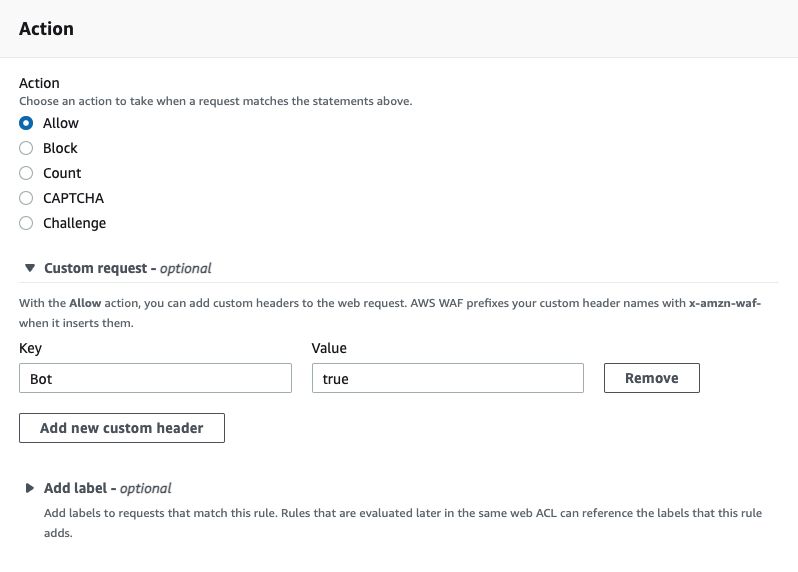
This will detect the top known AI bots. Next, for the action, be sure to choose "Allow" and to add a custom header. Ours is called bot, but
feel free to make this anything unique.
Next, navigate to the CloudFront product and to the "Functions" tab. Create a new function and paste in the following javascript:
function handler(event) {
  if (event.request.headers['x-amzn-waf-bot'] !== undefined) {
    const host = event.request.headers.host.value
    const uri = event.request.uri
    const newurl = `https://tollbit.${host}${uri}`
    const response = {
      statusCode: 302,
      statusDescription: 'Found',
      headers: { location: { value: newurl } },
    }
    return response
  }
  return event.request
}
Earlier, our WAF rule had set a header called bot onto the request if it matched the rule. Amazon automatically appends x-amzn-waf- to the header,
so the actual header to look for is now called x-amzn-waf-bot. If this header exists, it means that our WAF rule detected that this request
is a bot request, so we now want to forward it to our tollbit subdomain. Once you are ready, save the changes and publish this code.
On the publish tab, you will then need to associate this function to your existing CloudFront distribution.
This code snippet will run for every request to your distribution. Please ensure you've tested this function before completeing this step.
CloudFlare
There are several levels of bot detection and forwarding that you can configure for CloudFlare, depending on whether or not you are on their Enterprise plan.
The code snippets here are for a clean CloudFlare environment. If you have existing workers that are processing requests from your domain, you will need to integrate these scripts into your existing worker.
Bot Paywall on any Plan (Including Free)
Follow the steps described here up until you have created a
new worker. Name this working something to help you keep track of it's function (such as bot-forwarding-worker).
Once you've created this worker, click into edit code and do the following to set up your forwarding worker.
If you have already created a CloudFlare worker for log forwarding, DO NOT create a new worker. Use your existing worker when following these instructions. This is because you cannot have two CloudFlare workers on the same route, and if you do, only one will be receive requests.
If you have set up log forwarding, copy and replace your worker.js file with this code instead. Make sure that you keep your TollBit token copied over into the code.
// this is a non-exhaustive list of agents that we recommend you get started with first
// Add any other agents you would like to forward into this list.
const botList = [
  'ChatGPT-User',
  'PerplexityBot',
  'GPTBot',
  'anthropic-ai',
  'CCBot',
  'Claude-Web',
  'ClaudeBot',
  'cohere-ai',
  'YouBot',
  'Diffbot',
  'OAI-SearchBot',
  'meta-externalagent',
  'Timpibot',
  'Amazonbot',
  'Bytespider',
  'Perplexity-User',
]

const CF_APP_VERSION = '1.0.0'

const tollbitLogEndpoint = 'https://log.tollbit.com/log'
const tollbitToken = 'YOUR_SECRET_KEY_HERE'

const sleep = (ms) => {
  return new Promise((resolve) => {
    setTimeout(resolve, ms)
  })
}

const makeid = (length) => {
  let text = ''
  const possible = 'ABCDEFGHIJKLMNPQRSTUVWXYZ0123456789'
  for (let i = 0; i < length; i += 1) {
    text += possible.charAt(Math.floor(Math.random() * possible.length))
  }
  return text
}

const buildLogMessage = (request, response) => {
  const logObject = {
    timestamp: new Date().toISOString(),
    client_ip: '', // worker only is able to get cloudflare edge IP, leaving blank
    geo_country: request.cf['country'],
    geo_city: request.cf['city'],
    geo_postal_code: request.cf['postalCode'],
    geo_latitude: request.cf['latitude'],
    geo_longitude: request.cf['longitude'],
    host: request.headers.get('host'),
    url: request.url.replace('https://' + request.headers.get('host'), ''),
    request_method: request.method,
    request_protocol: request.cf['httpProtocol'],
    request_user_agent: request.headers.get('user-agent'),
    request_latency: null, // cloudflare does not have latency information
    request_referer: request.headers.get('referer'),
    response_state: null,
    response_status: response.status,
    response_reason: response.statusText,
    response_body_size: response.contentLength,
    signature: request.headers.get('signature'),
    signature_agent: request.headers.get('signature-agent'),
    signature_input: request.headers.get('signature-input'),
  }
  return logObject
}

// Batching
const BATCH_INTERVAL_MS = 20000 // 30 seconds
const MAX_REQUESTS_PER_BATCH = 500 // 500 logs
const WORKER_ID = makeid(6)

let workerTimestamp

let batchTimeoutReached = true
let logEventsBatch = []

// Backoff
const BACKOFF_INTERVAL = 10000
let backoff = 0

async function addToBatch(body, event) {
  logEventsBatch.push(body)

  if (logEventsBatch.length >= MAX_REQUESTS_PER_BATCH) {
    event.waitUntil(postBatch(event))
  }

  return true
}

async function handleRequest(event) {
  const { request } = event
  const isBotRequest = checkIfBotRequest(request)

  // if bot request, immediately forward to subdomain
  if (isBotRequest) {
    const path = request.url.replace(
      'https://' + request.headers.get('host'),
      '',
    )
    let host = request.headers.get('host') || ''
    if (host.startsWith('www.')) {
      // remove www
      host = host.slice(4)
    }
    return Response.redirect('https://tollbit.' + host + path, 302)
  } else {
    const response = await fetch(request)
    // otherwise add to log batch and return response
    const eventBody = buildLogMessage(request, response)
    event.waitUntil(addToBatch(eventBody, event))
    return response
  }
}

const fetchAndSetBackOff = async (lfRequest, event) => {
  if (backoff <= Date.now()) {
    const resp = await fetch(tollbitLogEndpoint, lfRequest)
    if (resp.status === 403 || resp.status === 429) {
      backoff = Date.now() + BACKOFF_INTERVAL
    }
  }

  event.waitUntil(scheduleBatch(event))

  return true
}

const postBatch = async (event) => {
  const batchInFlight = [...logEventsBatch.map((e) => JSON.stringify(e))]
  logEventsBatch = []
  const body = batchInFlight.join('\n')
  const request = {
    method: 'POST',
    headers: {
      TollbitKey: `${tollbitToken}`,
      'Content-Type': 'application/json',
    },
    body,
  }
  event.waitUntil(fetchAndSetBackOff(request, event))
}

const scheduleBatch = async (event) => {
  if (batchTimeoutReached) {
    batchTimeoutReached = false
    await sleep(BATCH_INTERVAL_MS)
    if (logEventsBatch.length > 0) {
      event.waitUntil(postBatch(event))
    }
    batchTimeoutReached = true
  }
  return true
}

const checkIfBotRequest = (request) => {
  const userAgent = request.headers.get('User-Agent') || ''

  for (var i = 0; i < botList.length; i++) {
    if (userAgent.toLowerCase().includes(botList[i].toLowerCase())) {
      return true
    }
  }
  return false
}

addEventListener('fetch', (event) => {
  event.passThroughOnException()

  if (!workerTimestamp) {
    workerTimestamp = new Date().toISOString()
  }

  event.waitUntil(scheduleBatch(event))
  event.respondWith(handleRequest(event))
})
This code will immediately let through anyone with a known browser, and check all other requests against a list that we will periodically update with known bad user agents.
If you have not set up log forwarding and just want to forward bot traffic, put this code in your worker.js file.
// this is a non-exhaustive list of agents that we recommend you get started with first
// Add any other agents you would like to forward into this list.
const botList = [
  'ChatGPT-User',
  'PerplexityBot',
  'GPTBot',
  'anthropic-ai',
  'CCBot',
  'Claude-Web',
  'ClaudeBot',
  'cohere-ai',
  'YouBot',
  'Diffbot',
  'OAI-SearchBot',
  'meta-externalagent',
  'Timpibot',
  'Amazonbot',
  'Bytespider',
  'Perplexity-User',
]

export default {
  fetch(request) {
    const userAgent = request.headers.get('User-Agent') || ''
    const path = request.url.replace(
      'https://' + request.headers.get('host'),
      '',
    )
    let host = request.headers.get('host') || ''
    if (host.startsWith('www.')) {
      // remove www
      host = host.slice(4)
    }
    for (var i = 0; i < botList.length; i++) {
      if (userAgent.toLowerCase().includes(botList[i].toLowerCase())) {
        return Response.redirect('https://tollbit.' + host + path, 302)
      }
    }

    // Default behaviour
    return fetch(request)
  },
}
CloudFlare Enterprise and Bot Management
If you are on Enterprise and are using Bot Management, you should have access to the bot score
in the header of the request. You can replace the checkIfBotRequest function in the previous
worker scripts to use something similar to the following, and you can set the BOT_SCORE_THRESHOLD
to determine how strict your forwarding is. CloudFlare lists what each score range means.
const checkIfBotRequest = (request) => {
  const userAgent = request.headers.get('User-Agent') || '';

  // Check for known AI agents
  for (let i = 0; i < botList.length; i++) {
    if (userAgent.toLowerCase().includes(botList[i].toLowerCase())) {
      return true;
    }
  }

  // Check bot score
  const botScore = request.cf?.botManagement?.score;
  if (botScore !== undefined && botScore < BOT_SCORE_THRESHOLD) {
    return true;
  }

  return false;
};
This worker will intercept and potentially forward traffic from your site. It is crucial to make sure that you incrementally deploy this to a subset of your pages first and QA it thoroughly to ensure that it is not blocking human traffic or good bot traffic (Google, etc) before elevating it across your entire website.
Enterprise
If you have CloudFlare enterprise, you should be able to use the Bot Management product to get a bot score for each request. You can add logic in the above code's checkIfBotRequest function to also return true if the bot score is lower than a certain threshold.
Fastly
Fastly allows you to set up redirectly using VCL snippets. In this document, we will go over setting up forwarding requests from known bots to your tollbit subdomain.
The code shown here is for a clean Fastly environment. If you have any existing VCL scripts that intercept requests, you will need to integrate these scripts into your existing workflow.
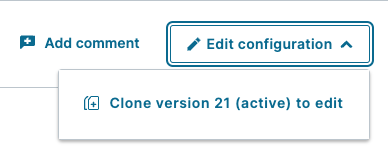
Go to the Deliver tab and select the domain you wish to add bot forwarding to. On the right side of the screen, click the Edit configuration button and choose to clone your current active version.
On the left hand sidebar, click "VCL Snippets".
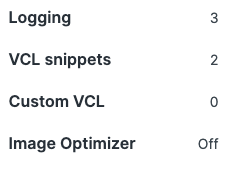
Create a snippet and name it something like tollbit-bot-forwarding-recv. This is the VCL code that will detect if a bot is using one of our known bad user agents, and will forward it to your subdomain. Put the following logic into the snippet. Make sure that the placement of the snippet is within the recv subroutine.

Copy and paste the following code block into the VCL input field and save. Don't worry, this VCL script will not actually apply until you activate the current Fastly version that you are editing.
if (req.http.user-agent ~ "(?i)chatgpt-user|perplexitybot|gptbot|anthropic-ai|ccbot|claude-web|claudebot|cohere-ai|youbot|diffbot|oai-searchbot|meta-externalagent|timpibot|amazonbot|bytespider|perplexity-user") {
  if (std.prefixof(req.http.host, "www.")) {
    set req.http.host = std.replace_prefix(req.http.host, "www.", "tollbit.");
  } else {
    set req.http.host = "tollbit." + req.http.host;
  }
  error 600;
}
Next, create another VCL snippet. This time, call it something like tollbit-bot-forwarding-error. This time, make sure that the placement is within the error subroutine.

Paste the following code in this snippet. This will set the correct headers and status code for the redirection done in the previous snippet.
if (obj.status == 600) {
  set obj.status = 307;
  set obj.response = "Temporary Redirect";
  set obj.http.Location = req.protocol + "://" req.http.host + req.url;
  set obj.http.cache-control = "max-age=0";
  return (deliver);
}
The VCL scripts you just added will intercept and potentially redirect traffic to your main site. Please ensure that you have tested this in a test environment or for a small subset of pages before activating this across your entire site.
This should now be all you need to forward known bot traffic to your tollbit subdomain! You can activate these changes by clicking "Apply".
Akamai
Akamai allows you to set up redirection rules at the edge using Cloudlets. Specifically, they provide Edge Redirector Cloudlets that help you manage redirection using certain matching rules.
We want to first start by creating an Edge Redirector policy. Follow the documentation here to do so in accordance with how your Akamai instance is set up.
Once you have set up your policy, follow the documentation here to set up rules for your Edge Redirector. Because we want to be redirecting based on the User-Agent header, we will need to create a redirector with advance matching rules. You will want to create a match type based on the request header. The name of the header should be User-Agent, and the value should be a tab separated list of bad user agents. You can use the following list:
ChatGPT-User PerplexityBot GPTBot anthropic-ai CCBot Claude-Web ClaudeBot cohere-ai YouBot Diffbot OAI-SearchBot meta-externalagent Timpibot Amazonbot Bytespider Perplexity-User
For the operator value, use is one of without case sensitivity. These settings should let you match our known bad users agents. In the redirection rule, you can set the redirect url to your tollbit subdomain.
Ensure that the path is preserved in the redirect. Akamai has an example of this in their docs
and we should be able to follow it by setting the redirect url to https://tollbit.<your_site>/\2. The \2 should preserve the path.
Cloudlets Policy Manager evaluates rules from top to bottom, and picks the first rule that matches. If you have other Cloudlets with rules that also intercept requests, they may match before the rule you just added.
Click save rule to save your changes, and you should be ready to activate! Follow the steps here to do so.
The rule you just added will intercept and potentially redirect traffic to your main site. Please ensure that you have tested this in a test environment or for a small subset of pages before activating this across your entire site.
Vercel
To redirect bots to your TollBit subdomain you can use Vercel's Custom WAF rules.
Create a new rule. Set the rule to look at the User Agent and selected Matches expression. Copy the following regex as the expression to match. Feel free to modify to remove or block different bots.
(ChatGPT-User|PerplexityBot|GPTBot|anthropic-ai|CCBot|Claude-Web|ClaudeBot|cohere-ai|YouBot|Diffbot|OAI-SearchBot|meta-externalagent|Timpibot|Amazonbot|Bytespider|Perplexity-User)
Set the rule to redirect to your TollBit subdomain by changing the Then option to Redirect and copy in your TollBit subdomain. The rule should look like this when you're finished

Finally, click save rule. The change won't go into effect until you publish the change to go live.
Google Cloud Armor
Google's Cloud Armor allows you to set up some simple redirection rules for user agents.
Note that to implement the full solution, where we want to preserve the path of the content, you will need to set up a separate backend service that handles redirection that preserves path. However, you can simply just redirect to the root tollbit subdomain as well to get most of the functionaltiy.
First, navigate to Cloud Armor policies and create a new one (or add this to your existing policy). Set the default rule to allow.
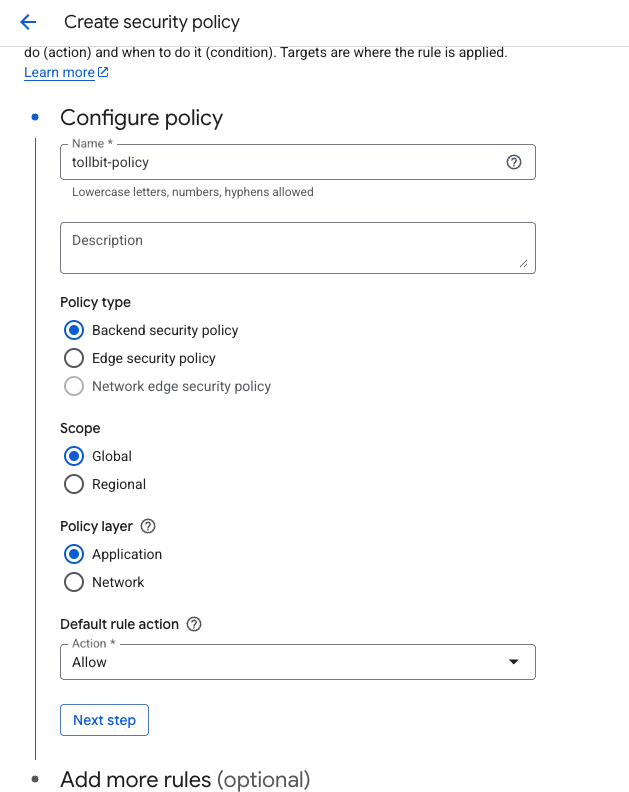
Next, add more rules and select "Advanced mode". You can add preferred user agents that you want to redirect in the match rules box.
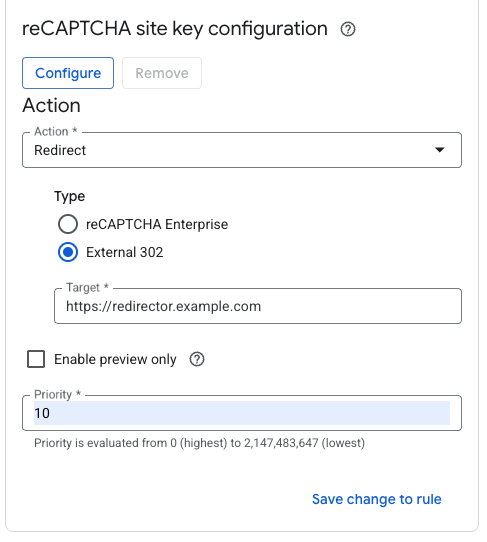
Next, select "Redirect" as the action for the rule, and if you do have a redirection backend service that
preserves path, put the URL to that service. Otherwise, put the root tollbit subdomain for your site (tollbit.yoursite.com).
Save and activate your policy.
Azure Front Door
Azure's CDN lets you easily set up redirection rules for different bots. We'll explore how to do this in the standard tier Front Door as well as the premium tier.
Standard
Navigate to your Front Door instance and click the dropdown for "Settings" on the left navbar.
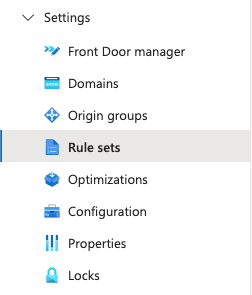
You can create a new rule set using the button at the top.

Then you can add rules for the bots you want to forward off to the TollBit Bot Paywall. We recommend the following list:
chatgpt-user, perplexitybot, gptbot, anthropic-ai, ccbot, claude-web, claudebot, cohere-ai, youbot, diffbot, oai-searchbot, meta-externalagent, timpibot, amazonbot, bytespider, perplexity-user
You can add or remove from this as befits your bot strategy. We can also keep these lowercased, since in the rules we are comparing the lowercased values. Click save to save these changes.
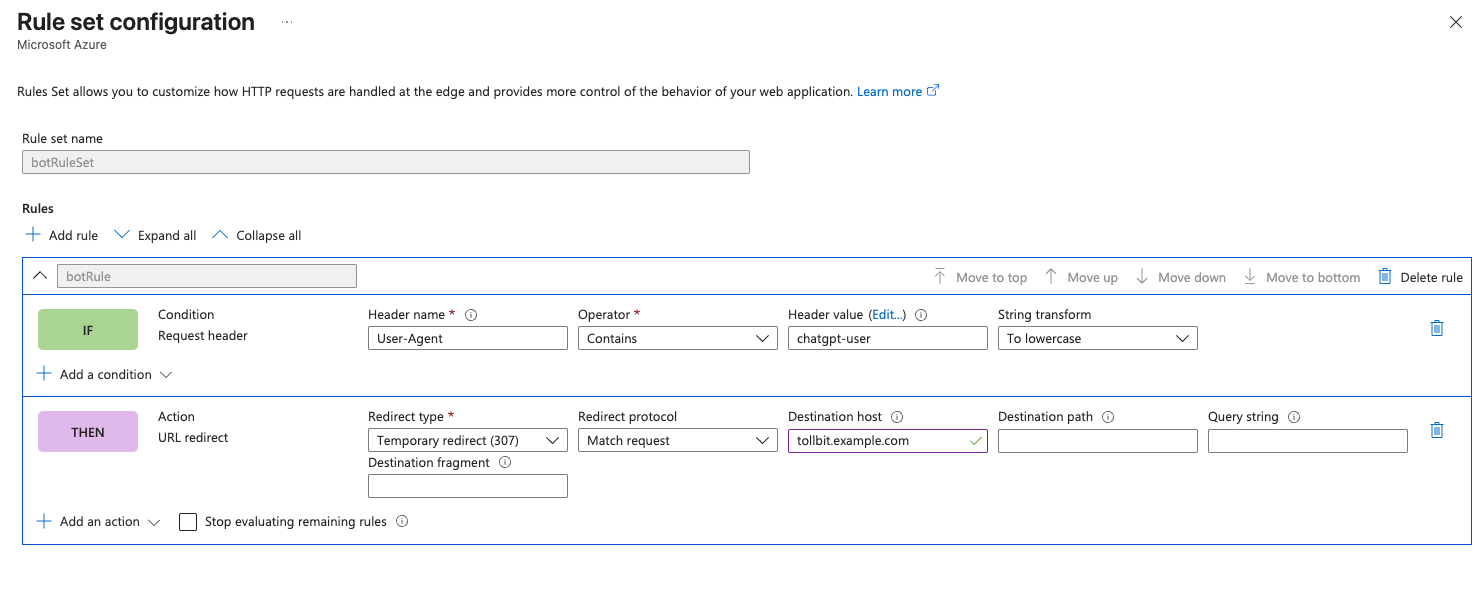
Once you've created this ruleset, you need to associate your Front Door route to it. Click the 3 horizontal dots to the right of the rule set, and click "Associate a route".
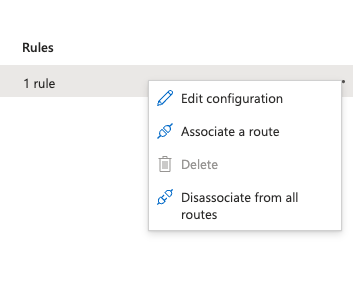
Choose the route to the relevant Front Door instance and go through the flow of associating this route.
Premium
If you have a Premium tier Front Door instance, contact our team at team@tollbit.com and we can connect with you and evalulate the best path forward.